Ultimate Smoked Pork Tenderloin Guide: Prep, Smoke Times, Wood Pairings, and More

Hi, I’m Chef Marcus.
If you’ve ever skipped over pork tenderloin at the butcher counter because it felt too lean, too small, or too easy to get wrong — you’re not alone. But give it the right attention, and it becomes one of the most rewarding cuts to smoke: fast, clean, and remarkably versatile.
This guide lays out everything I’ve learned from smoking tenderloin dozens of different ways — the methods that actually work, the seasoning approaches that bring it to life, and the common mistakes that quietly ruin a good cook. Whether you’re running a pellet smoker or charcoal, aiming for classic barbecue flavor or something more experimental, you’ll find a path here that fits.
Let’s break it down step by step — and make this cut earn its place in your lineup.
- I. Understanding the Cut: What Makes Pork Tenderloin Unique
- II. Equipment Overview: What You Actually Need to Smoke It Right
- III. The Anatomy of Flavor: Marinades, Rubs, and Brines
- IV. Prep Like a Pro: Step-by-Step Before It Hits the Smoker
- V. Smoking Methods: Low and Slow vs Hot and Fast
- VI. Temperature Targets: Cooking to Perfection
- VII. The Smoking Timeline: Minute-by-Minute Breakdown
- VIII. Slicing and Serving: Get the Most Out of Your Tenderloin
- IX. Sauces, Glazes, and Finishing Touches
- X. Serving Ideas: From Backyard BBQ to Fancy Dinner
- XI. Variations: Flavor Spins That Keep It Fresh
- XII. What to Do with Leftovers: Don’t Let It Go to Waste
- XIII. Storing and Reheating Without Losing the Magic
- XIV. Wood Selection Deep Dive: Pairing Smoke with Pork
- XV. Troubleshooting: Common Pitfalls and How to Fix Them
- XVI. Smoked Pork Tenderloin FAQ
- XVII. Final Thoughts: Why This Cut Earns a Spot in Your Smoker Lineup
I. Understanding the Cut: What Makes Pork Tenderloin Unique
Pork tenderloin gets a weird reputation — too lean to be juicy, too small to be worth smoking, too easy to mess up. But none of that holds if you understand what you’re working with. It’s not just a miniature pork loin. It’s its own thing — and treated right, it delivers big.
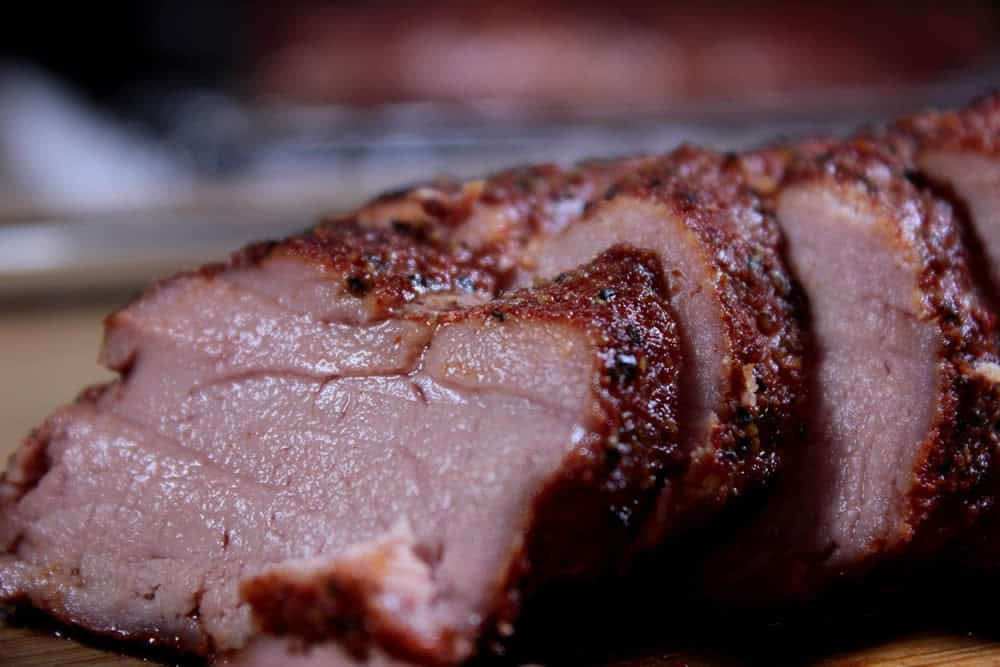
Let’s start with the basics. Pork tenderloin is a narrow, tapered muscle that runs along the backbone, and it’s one of the most tender cuts on the entire animal. Unlike the pork loin — which is broader, denser, and often has a fat cap — the tenderloin is slim, mild, and lean all the way through. No fat cap, no marbling to speak of. Each one usually weighs just over a pound, maybe 1.25 if you’re lucky. That makes it fast-cooking, which is both a blessing and a trap.
Because here’s the catch: tenderloin doesn’t forgive the way pork shoulder does. It doesn’t have fat to break down or connective tissue to transform over hours of heat. Go even ten degrees past done, and you’re already in dry territory. But pull it just right — at 140°F, rest to 145°F — and it slices like butter, still holding onto its juices.
Now, some folks will tell you that smoking lean meat is asking for disappointment. That only fatty cuts can handle the long ride. Not true. You just have to treat it like what it is — quick, delicate, and all about timing. Smoking pork tenderloin gives you the flavor depth you’ll never get from an oven, and it doesn’t take all day to get there. It’s one of the few cuts where you can go from fridge to plate in under two hours and still have it taste like you’ve been tending the fire all afternoon.
Of course, this also means it’s easy to screw up. Common mistake number one? Overcooking. People think they need to “make sure it’s cooked through,” and suddenly they’ve got pork jerky. Second: too much smoke. A little fruitwood goes a long way on a lean cut — you don’t need to blast it with mesquite for two hours unless you’re trying to win a bet. And third: weak seasoning. Tenderloin is mild. If you don’t season it like you mean it — salt, sugar, acid, smoke — it’ll come out tasting like air with texture.
So no, it’s not the easiest cut to smoke. But that’s kind of the point. Nail the balance — temperature, time, seasoning — and it rewards you with a clean, rich, sliceable piece of pork that tastes way bigger than it looks.
II. Equipment Overview: What You Actually Need to Smoke It Right
Smoking pork tenderloin doesn’t require a full backyard arsenal, but a little gear know-how goes a long way. This cut is quick, lean, and not especially forgiving, so it pays to keep things dialed in. Let’s talk setups, fuel, and a few tools that’ll keep your cook on track.

Smokers: What Works and Why
Pellet smokers are probably the easiest option here. You load the pellets, set your temperature, and let the machine do the rest. For pork tenderloin, that’s a win — the steady heat and mild smoke work well with a cut that cooks fast. You won’t get super deep bark or punchy smoke flavor unless you’re using stronger pellets, but the trade-off is consistency. No flare-ups. No fuss.
Offset smokers are great if you know what you’re doing. They let you control heat and smoke quality with precision, and you can use bigger chunks of wood for deeper flavor. But they’re overkill if you’re just doing a quick-cook tenderloin. You’ll spend more time managing the fire than the meat, and with only an hour or so of cook time, that’s a lot of effort for not a huge payoff unless you’re after something really dialed in.
Electric smokers are plug-and-play, and they work fine for this. Just keep in mind that most electric models burn wood chips, which produce a lighter, cleaner smoke. That’s okay for tenderloin — it doesn’t need hours in a smoke bath — but you won’t get a heavy smoke ring or deep charred flavor. Still, for a set-it-and-forget-it kind of job, they’re solid.
Kamado grills (like the Big Green Egg) are versatile and retain heat well, which makes them great for holding a steady low-and-slow zone. They can run hot, though, so you’ll want to stay on top of your vents. That said, if you’ve got one, it’ll handle pork tenderloin like a champ — just don’t treat it like a ribeye sear and rush the cook.
Fuel: Wood Selection and Format
For pork tenderloin, fruit woods are your best friend. Apple, cherry, or peach give a sweet, light smoke that complements the pork’s subtle flavor without burying it. Hickory is stronger — usable, but best in small doses or blended with a milder wood. Mesquite? Save it for beef. It’s too bold for this cut and can take over fast.
Wood chunks are ideal if you’re running a charcoal or offset setup — they burn slow and steady and are easy to manage for a short cook like this. Wood chips are best for electric smokers; they light quickly but burn out fast, so you’ll likely need to reload mid-cook. Pellets are specific to pellet smokers — they’re clean-burning and consistent, but make sure you’re using 100% hardwood. Some cheaper blends are mostly filler and give off weak smoke.
Useful Extras
You don’t need much, but a few extras can make the process smoother — and help avoid common mistakes.
- A wireless thermometer (or a solid probe thermometer) is essential. Pork tenderloin has a narrow target zone for doneness — you want it off the smoker around 140°F so it can coast to 145°F while resting. Guessing doesn’t work here.
- A water pan helps moderate temperature and keeps the smoking chamber humid. That can prevent the exterior from drying out before the center catches up. It’s more important if your smoker runs hot or if you’re in a dry climate.
- Butcher’s twine can be useful if one end of your tenderloin is significantly thinner than the other. Tie it into a more even cylinder and it’ll cook more consistently. Otherwise, the skinny end’s gonna dry out while the rest hits temp.
- A spray bottle is optional, but nice to have. A light spritz of apple juice, cider vinegar, or diluted broth halfway through the cook helps keep the bark moist and adds a little surface flavor. Don’t overdo it — one or two spritzes is plenty.
Bottom line: you don’t need much gear to make this work — but you do need to understand how your setup behaves. This cut won’t give you time to recover from big swings or second-guess your timing. Keep the tools simple and your process tight.
III. The Anatomy of Flavor: Marinades, Rubs, and Brines
Pork tenderloin doesn’t come with a ton of built-in flavor. That’s not a knock — it just means the seasoning has to carry more of the weight. The good news? It’s a blank canvas that plays well with almost anything: sweet, spicy, earthy, sharp. But if you just throw on some salt and hope for the best, you’ll end up with meat that tastes fine — not great. So let’s get into how to build real flavor into this cut from the inside out.

Dry Brine vs Wet Brine
Dry brine is the go-to if you want cleaner bark and a tighter exterior. Just salt the meat generously, maybe add a little sugar or spice to the surface, and let it sit uncovered in the fridge overnight. The salt draws moisture out, then pulls it back in — along with anything else you’ve added. It seasons deeper than a rub and helps the meat retain moisture during the cook. Bonus: it dries the surface slightly, which helps smoke stick better and encourages a light crust to form.
Wet brine is more of a safety net. Think saltwater bath, maybe with aromatics or sugar dissolved in. It won’t give you a crisp bark, but it adds moisture — which matters if you’re worried about overcooking or just want more margin for error. Great for newer smokers or if you’re doing a longer smoke and want the inside extra juicy. That said, wet-brined meat sometimes tastes a little washed out unless you follow up with a rub.
Which one to choose?
- Going for a crusty exterior and smoky surface flavor? Dry brine.
- Nervous about overcooking or running a hot fire? Wet brine.
Simple Rubs That Always Work
The best rubs for tenderloin don’t need to be complicated. Start with:
- Kosher salt — don’t skimp.
- Black pepper — coarse ground if you’ve got it.
- Garlic powder — not too much, or it can go bitter.
- Smoked paprika — for color and a light sweet-smoky note.
- Brown sugar — balances the salt and helps with browning.
That’s your base. It hits savory, smoky, and sweet in a way that pairs well with apple or cherry wood and doesn’t fight the pork’s natural flavor.
Going Deeper: More Advanced Rubs
If you’ve smoked tenderloin a few times and want to change things up, there are plenty of deeper cuts:
- Coffee rub: Finely ground coffee, cocoa powder, brown sugar, black pepper. Deep, bitter-sweet earthiness that plays well with a touch of heat. Works best if you’re planning to sear after smoking.
- Mustard crust: Slather on Dijon or whole grain mustard, then coat in your rub. The mustard helps the seasoning stick, adds tang, and gives the exterior some texture when it cooks down.
- Herb rubs: Dried thyme, rosemary, crushed fennel seed, maybe some lemon zest. These go lighter on the smoke, heavier on the aromatics. Great if you’re serving the meat with sides like greens or vinaigrettes.
Timing: When to Apply
The night before gives you deeper flavor — salt has time to penetrate, and the spices mellow out. If you dry brine overnight, pat the surface dry before applying any additional rub so it sticks cleanly and doesn’t clump.
An hour before still works — especially for rubs heavy on spices or sugar that can burn if they sit too long. You won’t get deep penetration, but you’ll build a seasoned crust. Just don’t expect the salt to reach the center.
If you’re pressed for time? Rub it down cold and go. Better than skipping seasoning altogether.
Optional Marinades for Flavor-Forward Profiles
Marinades aren’t always necessary, but they do have a place — especially if you’re aiming for bold, global flavors or prepping ahead for a quick smoke.
- Soy, mirin, and ginger: A short soak in this brings a salty-sweet-umami kick with a little sharpness from the ginger. Add garlic, scallions, or sesame oil for more depth. Great with a clean fruit wood and a quick glaze finish.
- Mustard-balsamic: Sharp, tangy, and slightly sweet. Whisk Dijon mustard, balsamic vinegar, olive oil, and crushed garlic. Let the pork soak for a few hours, then smoke it as-is or pat it dry and hit it with a rub for a hybrid approach.
Keep in mind — marinades don’t penetrate much past the surface. Their real value is in how they set the stage for a glaze or post-smoke sear. If you’re using one, give it time (at least 2–3 hours), and make sure to pat the meat dry before it hits the smoker so you don’t steam the surface.
IV. Prep Like a Pro: Step-by-Step Before It Hits the Smoker
Smoking pork tenderloin isn’t complicated, but like anything lean and fast-cooking, it doesn’t leave much room for sloppiness. Prep matters. You don’t have hours of cooking time to fix mistakes mid-way — so the work you do before it hits the smoker is what sets you up for a clean, even cook and better flavor across the board. Let’s walk through the steps that actually make a difference.
Trimming: Get Rid of the Silver Skin
The first thing you’ll want to deal with is the silver skin — that shiny, tough membrane running along part of the tenderloin. It’s not fat. It’s connective tissue, and it doesn’t break down during cooking. Leave it on, and you’ll end up with chewy bites and uneven seasoning, since rubs won’t stick to it well.
Here’s how to remove it without mangling the meat:
- Use a small, sharp knife — a boning knife or utility blade works well.
- Slide the tip under one end of the silver skin to create a small flap.
- Angle the blade slightly upward and gently slice along the underside of the membrane while pulling it tight with your fingers.
- Keep the knife just under the silver skin — not into the meat.
Go slow. One clean strip is better than hacking at it in chunks. And don’t worry about getting every single bit — just the thick central strip that would otherwise chew like plastic.
Tying: Even Out the Thickness
Most pork tenderloins taper toward one end — which means the skinny end cooks faster and dries out while the thicker section is still warming up. Tying it (or trussing, if you want to sound fancy) is an easy fix.
You don’t need a full roast-style truss job. Just fold the thin end underneath itself to match the thickness of the rest of the meat, then use butcher’s twine to tie one or two loops around the body to keep it tucked. This helps it cook more evenly, hold its shape, and look cleaner when sliced. If your tenderloin is fairly uniform already, you can skip this — but if there’s a clear tail end, take the extra minute.
Dry the Surface for Better Smoke and Bark
Moisture on the surface is the enemy of good bark. It creates steam, which blocks smoke from sticking and stops the surface from drying out and caramelizing. Whether you brined, marinated, or just unwrapped your meat from the package, pat it dry with paper towels before you season or smoke it.
This is especially important if you’re going with a dry rub or planning to get any kind of crust. A dry surface grips smoke better and encourages a slightly tacky rub layer — the kind that fuses into the meat instead of sliding off as soon as it warms up.
Let It Rest at Room Temp Before Smoking
Last thing: don’t take the pork straight from the fridge to the smoker. A cold piece of meat won’t cook evenly — the outside will heat up faster than the core, and you’ll either overcook the edges or undercook the middle. Not ideal for a cut with tight timing.
Instead, let it rest at room temperature for 30 to 45 minutes before it goes on the smoker. Not long enough to risk anything sketchy — just enough to take the chill off and give you a more predictable, even cook. While it rests, you can finish prepping your smoker, mix up a glaze, or sip something cold. No rush.
Pork tenderloin moves fast once it hits heat. But if you put in the work up front — a clean trim, even thickness, dry surface, and gentle warm-up — you’re not playing catch-up mid-cook. You’re just watching it finish strong.
V. Smoking Methods: Low and Slow vs Hot and Fast
Pork tenderloin doesn’t need to be smoked all day — and in fact, it shouldn’t be. This is a fast cut. But the way you handle the heat changes how it turns out. You’ve got a few solid approaches: low and slow for deeper smoke and texture, hot and fast for a quicker cook that still comes out juicy, or a hybrid method that borrows the best of both.
Let’s break each one down.
Low and Slow (225–250°F): Maximum Smoke, Better Bark
This is the traditional smoking zone — and if you’re chasing that deep, wood-fired flavor and a bit of exterior texture, this is where you want to be. Running your smoker at 225–250°F gives the tenderloin time to pick up smoke, build some surface color, and stay gentle on the inside.
At this temp, you’re looking at about 1 hour to 1 hour 30 minutes, depending on thickness and ambient conditions. The smoke has more time to work in, the bark has a chance to set, and the meat cooks more evenly from edge to center. If you’re after clean slices with a light smoke ring and a tender bite, this is a solid method — especially when paired with a dry rub and light spritz halfway through.
Just keep in mind: too much time at low temp and you risk over-smoking. This isn’t brisket. Pork tenderloin doesn’t need hours to become tender — it already is. Watch your internal temps and pull it around 140°F.
Hot and Fast (275–300°F): Quick, Controlled, Still Juicy
Now, if you’re short on time or just prefer a more direct cook, 275–300°F works just fine. This method trims the cook time down to 30–45 minutes, depending on thickness and how aggressive your fire is. You won’t get quite as much smoke absorption or bark development, but if your rub has sugar or spices that caramelize fast, you’ll still get good surface flavor.
The key with hot and fast is control. You can’t wander off for 30 minutes and assume it’s still cruising. Things move quickly, and tenderloin’s doneness window is tight. This is where that wireless thermometer really earns its keep.
Hot and fast is also a good fit if you’re planning to glaze toward the end or finish with a quick sear — it keeps things juicy without overcomplicating the process.
The Hybrid Approach: Slow Start, High-Temp Finish
If you want smoke and a seared crust without drying out the meat, the hybrid method is your best bet. Start at 225–240°Ffor the first 30–40 minutes — just long enough to lay down a light smoke layer and firm up the outside. Then bump the heat up to 300–325°F or transfer to a hot grill or cast iron pan to finish.
The final few minutes of high heat tightens the exterior, deepens color, and gives you a touch of that roasted crust without sacrificing moisture. You’re not blasting it the whole time — just long enough to lock things in.
This approach also plays well with glazes. If you want to brush on a sauce, mustard mix, or sugary mop in the final 10 minutes, this higher heat helps it caramelize instead of just sitting wet on the surface.
Each method has its place.
- Want deeper smoke and don’t mind the wait? Go low and slow.
- Need dinner on the table without sacrificing tenderness? Hot and fast can handle it.
- Want a balance — light smoke, tight crust, juicy middle? Hybrid wins.
Just pick a method based on your timeline, your tools, and your flavor goals — and commit to it. The meat won’t wait for you to decide mid-smoke.
VI. Temperature Targets: Cooking to Perfection
Pork tenderloin lives and dies by internal temp. There’s no fat cushion or connective tissue to bail you out if you overshoot — which means you’ve got to know when to pull it. Guesswork doesn’t cut it here. Nail the internal temperature, and you’re rewarded with slices that are tender, juicy, and just pink enough to make people ask if it’s safe (it is). Miss it by ten degrees, and suddenly you’re slicing up sawdust.
Internal Temperature Goals
Here’s the short version:
- 135°F – Medium-rare. Still pink, incredibly tender, juicy all the way through. If you’re cooking for people who treat pork like beef, this is the sweet spot.
- 140°F–145°F – Medium to medium-well. Still moist, still flavorful, with a little less pink. This is the USDA-approved safe zone, and with carryover heat, it’s what most people aim for.
Pull it at 140°F, tent it with foil, and let carryover bring it to 145°F while it rests. That’s the move. That’s how you get flavor, texture, and safety in one shot.
If you’re still stuck thinking pork should be cooked “all the way through” like it’s 1985, consider this: a medium-rare pork tenderloin is like a perfect steak — firm but tender, juicy, just a little rosy in the middle. It’s not raw, it’s not unsafe — it’s properly cooked. USDA dropped the pork safe temp to 145°F years ago for a reason. The old rules are dead. Don’t cook like you’re still afraid of trichinosis from a supermarket pork chop.
Use a Probe Thermometer. No Exceptions.
Pork tenderloin has a tight doneness window. There’s about a 10-degree gap between just right and just ruined. That’s too small to eyeball or go by feel — especially with a cut that tapers at the ends.
A probe thermometer takes the guesswork out. Leave it in the thickest part of the meat, watch the temp climb in real-time, and pull it when it hits the mark. Even better if it’s a wireless or leave-in model, so you don’t have to keep opening the lid and dumping heat.
If you don’t have one, now’s the time. It’s not just a pork thing — it’s an every-protein thing. And it makes the difference between confident cooking and crossing your fingers.
Resting: Don’t Skip It
Once you hit that target temp and pull the tenderloin, don’t go straight to slicing. Give it 10–15 minutes, loosely tented with foil, to rest. This does two things:
- Carryover heat finishes the cook gently, taking it up that last 5°F.
- Juices redistribute. Cut into it too soon, and you’ll watch all the moisture you worked for run out onto the board.
Resting isn’t optional. It’s part of the cooking process. Skip it, and you’re leaving flavor and texture on the table.
If you do nothing else right — if your rub is basic, your smoke is light, and your technique is messy — hit the temp and rest the meat. That alone will give you better results than 90% of backyard cooks winging it. This cut doesn’t ask for much. But it does ask for precision. Give it that, and it pays you back every time.
VII. The Smoking Timeline: Minute-by-Minute Breakdown
Pork tenderloin doesn’t demand an all-day cook. It’s fast by smoking standards — which is great, but also means there’s not much time to recover from mistakes. From the moment you pull it out of the fridge to the moment you’re slicing into it, you’re looking at about two hours total. But within that, timing matters.
Here’s what that actually looks like, start to finish:
Prep Time: ~20 Minutes
- Trim the silver skin — a few clean knife passes.
- Tie the tail end (if needed) so it cooks evenly.
- Pat it dry with paper towels.
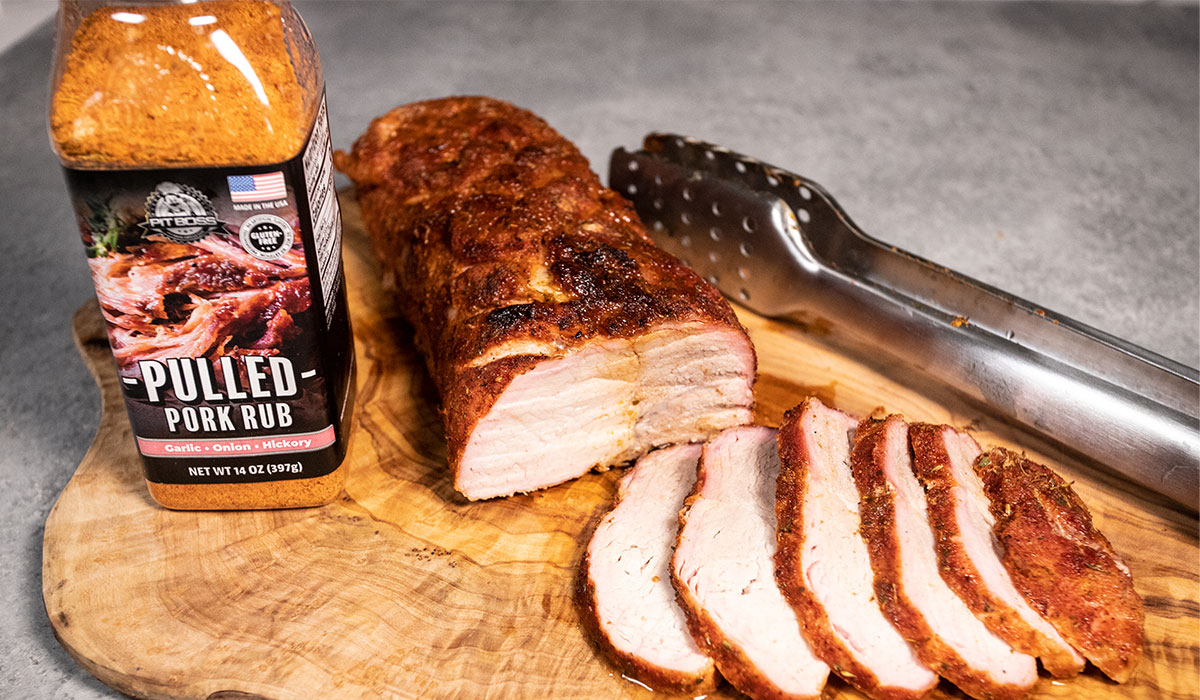
- Season it — either with your pre-made rub, or just salt, pepper, and whatever else you’re layering in.
- Let it rest at room temp while you fire up the smoker and prep your fuel.
This is your setup window. You can do it faster if you’re in the zone, but 20 minutes gives you breathing room and makes sure everything’s ready before the meat hits heat.
Smoking Time: ~60 to 90 Minutes at 225°F
Once the smoker’s rolling steady and you’ve added your wood:
- Place the tenderloin directly on the grates.
- If using a probe thermometer, insert it into the thickest part now.
- Let it go undisturbed for the first 45–60 minutes — that’s when most of the smoke uptake happens.
- Around the 60-minute mark, start watching internal temp. You’re aiming for 140°F, knowing it’ll climb another 5 degrees during the rest.
- If it’s a smaller tenderloin or your smoker runs hot, expect it to finish closer to 1 hour. Bigger cuts or cooler weather might stretch it to 1.5 hours — but rarely more than that.
Optional: give it a quick spritz with apple juice or diluted vinegar about halfway through if the surface looks dry.
Optional Sear: ~5 Minutes
Want a crust? Two ways to get it:
- Cast iron sear: Pull the tenderloin at 135°F, toss it in a ripping hot pan for 30–60 seconds per side until the surface darkens and caramelizes.
- Reverse sear on the grill: Same idea, but over direct flame or high-heat coals. Watch closely — sugars in the rub can burn fast.
Only do this if you’ve left yourself a few degrees of temp buffer. Pulling at 140°F and then blasting it will overshoot quickly.
Rest Time: 10–15 Minutes
Pull it, tent it with foil, and leave it alone. This is where the final internal temp evens out and juices settle back into the meat. Skip the rest, and you’ll see all that moisture hit the cutting board instead of staying in the meat.
Total Time: ~2 Hours
Give or take 10–15 minutes depending on smoker temp, meat size, and whether you’re searing or just slicing straight. But the whole process — from first trim to final slice — lands right around two hours. That’s weeknight territory. Fast enough for dinner, good enough for company. Just stay on top of your timing, and pork tenderloin doesn’t waste a minute.
VIII. Slicing and Serving: Get the Most Out of Your Tenderloin
You did the prep, you nailed the temp, and now the pork’s been resting quietly under foil like it’s waiting for a round of applause. Don’t blow it at the finish line. Slicing and serving might seem like the easy part, but it’s where a lot of the magic — or mess — happens. Done right, you highlight the work you already put in. Done wrong, you lose moisture, texture, and presentation in one go.
How to Slice It
First rule: cut across the grain. Pork tenderloin isn’t a big cut, so this step’s easy to miss — but if you slice with the grain, you’ll get long, chewy strands instead of clean bites. Look at the muscle fibers, turn the tenderloin 90 degrees, and slice perpendicular to those lines.
Thickness depends on what you’re serving it with:
- ½-inch medallions are the classic move — tender, juicy, and thick enough to hold up on their own. Great for plating or stacking.
- Thinner slices — about ¼ inch — work better for sandwiches or topping bowls. They cool faster, but layer well and stretch the meat further if you’re feeding a crowd.
Use a sharp slicing knife or chef’s knife, not a serrated blade. Go in smooth. Let the knife do the work — no need to saw or press down hard. If the meat pushes juice out as you cut, you’re either slicing too soon (should’ve rested longer) or using too much pressure.
What to Avoid
- Sawing the meat apart — it tears fibers instead of cutting cleanly.
- Squeezing the tenderloin while slicing — that forces juice out.
- Letting it sit too long post-resting — tenderloin cools fast. Slice and serve shortly after resting to catch it at peak tenderness.
Best Ways to Serve It
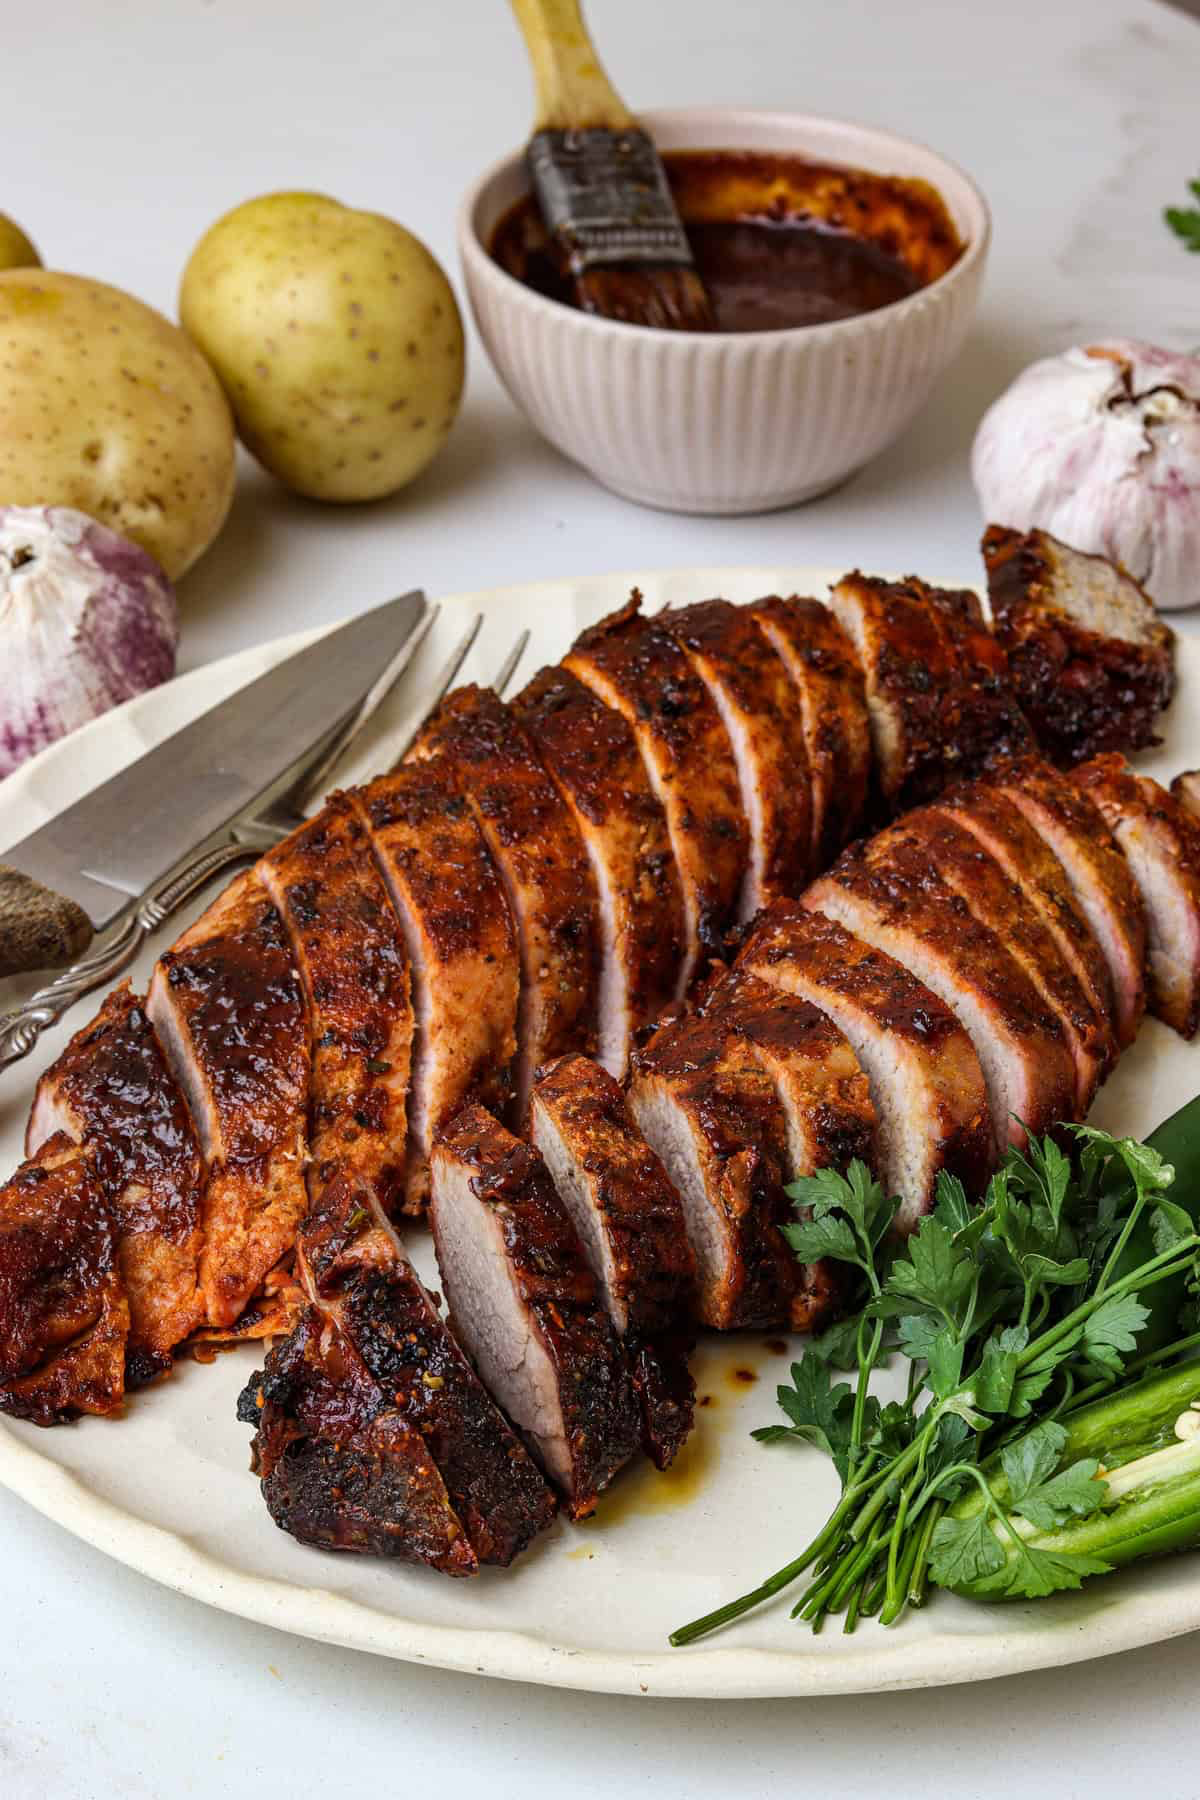
Presentation isn’t everything, but let’s be honest — good food looks good. A few ways to plate that keep it sharp:
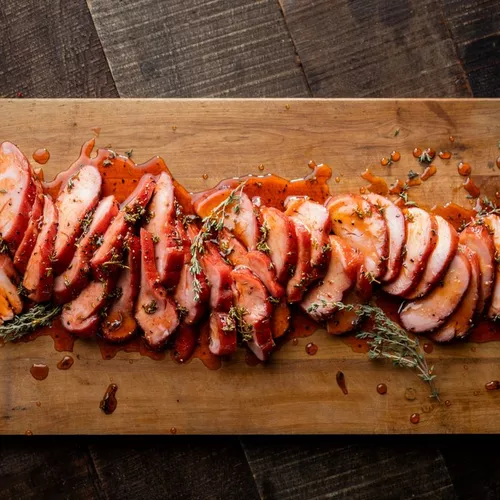
- Fanned medallions on a platter: Lay slices slightly overlapping, like a deck of cards, with the tapered end tucked in for symmetry. Drizzle with glaze, sauce, or a little resting juice.
- Whole and garnished: If you’re carving tableside or bringing it out for a family meal, leave it whole, slice it in front of guests, and hit it with fresh herbs, charred citrus, or a bit of flaky salt on top.
- Sliced over grains or greens: Thin slices stacked across a bed of wild rice, couscous, or salad greens — adds contrast and soaks up the juice. A quick vinaigrette or citrus splash brings the whole thing into balance.
No matter how you serve it, the goal is the same: highlight the texture, show off the cook, and don’t drown it in sauce unless that was the plan all along. Pork tenderloin doesn’t need a lot of help once it’s cooked right. Just slice it clean, plate it with intention, and let it speak for itself.
IX. Sauces, Glazes, and Finishing Touches
Pork tenderloin holds its own when smoked right — but a good sauce or glaze can take it from “solid cook” to “what isthis and when are you making it again.” Because the meat’s mild, it’s basically an invitation to layer in whatever flavor direction you’re feeling: sweet, tangy, spicy, sharp. You can go barbecue, herbaceous, even a little fancy. Just match the sauce to the mood — and know when to bring it in.
BBQ Glazes That Work
If you’re going the traditional route, you’ve got a few classics that pair well with smoked pork:
- Kansas City-style: Thick, sweet, tomato-based with molasses and brown sugar. Stickier and heavier, but gives you that shiny, lacquered finish.
- Carolina mustard: Tangy, sharp, a little sweet from honey or brown sugar. Works great on pork — especially if your rub leaned savory.
- Maple-bourbon glaze: A quick simmer of maple syrup, bourbon, a splash of cider vinegar, and a pinch of chili flakes. Sweet and boozy with a little heat — not overpowering, just layered.
If you’re glazing, the timing is key. Brush it on during the last 10–15 minutes of smoking, once the surface is set and the temp’s closing in on done. That way, it tacks on without burning or sliding off. Too early and it’ll burn from the sugar. Too late and it’ll sit cold on top.
You can also glaze after slicing, especially if it’s a thinner, sauce-style glaze. Just drizzle and serve. It won’t bake in, but it gives you a fresh top layer of flavor.
No-Sauce Options That Still Bring the Heat
Not everything needs to be sticky. Some of the best flavor pairings for pork tenderloin don’t look like sauce at all:
- Chimichurri: Parsley, garlic, vinegar, oil, red pepper flake. Punchy and bright — the acid cuts the smoke, and it’s especially good if your rub had a savory or herb base.
- Smoked garlic aioli: Rich, mellow, just enough bite to hold its own. Killer on sandwiches.
- Pepper jam: Sweet and spicy. Serve it as a glaze substitute or on the side — especially good with cornbread or greens on the plate.
These are best served cold or room temp, after slicing. Let the meat be the star — the sauce should just wake it up.
Pan Sauces From the Sear
If you did a cast iron sear to finish, you’ve already got the start of a killer sauce sitting in the pan. Deglaze with a splash of broth, cider, wine, or even water. Scrape up the bits, stir in a pat of butter, and maybe finish with a dash of mustard or vinegar. Spoon it over the slices and call it done.
You won’t get volume from this — it’s not a gravy situation — but the depth and richness make up for it. It’s that final layer that pulls the whole cook together without shouting over the smoke.
X. Serving Ideas: From Backyard BBQ to Fancy Dinner
One of the perks of smoking pork tenderloin — aside from how quick it is — is how easily it shape-shifts once it’s sliced. It’s neutral enough to play well with bold flavors, lean enough to sit next to heavier sides without turning the plate greasy, and tender enough to go hot, cold, or reheated without falling apart. Whether you’re serving a crowd or just stretching leftovers into something new, this cut’s got range.
Sandwiches: Fast, Stacked, No Forks Required
Start with a crusty roll or ciabatta, something sturdy enough to hold up under meat, sauce, and whatever else you pile on. Sliced pork medallions go right in, stacked and layered with:
- Pickled red onions for brightness
- Spicy mayo or chipotle aioli for kick
- Maybe a bit of coleslaw or arugula if you want some crunch and contrast
If you want it hot, give the pork a quick reheat and toast the bread. If you want it cold, slice thin and hit it with mustard and greens. Either way, it’s lunch that feels like you cooked — even if you didn’t that day.
Plated Meals: Classic and Clean
This is where pork tenderloin steps up. If you’re going for a sit-down meal, keep it grounded with sides that let the meat hold the center:
- Roasted root vegetables (think carrots, parsnips, beets) add earthy sweetness that pairs with smoky pork.
- Creamy polenta gives you that soft, rich base to catch all the juices and any pan sauce you worked up.
- Grilled asparagus or green beans for something snappy and charred — balances out a glaze or sweet rub nicely.
Plate it with intention — a few fanned medallions, sauce off to the side or drizzled light, nothing buried or hidden. It’s pork, not prime rib, but it deserves to look good.
Bowls: Weeknight Fuel, Done Right
For something lighter but still satisfying, slice the pork and layer it into a grain bowl:
- Base of farro, wild rice, or even quinoa
- Top with greens — arugula, kale, spinach — something fresh
- Add roasted squash, pickled veg, or sliced avocado for balance
- Finish with a sharp vinaigrette or yogurt sauce
Bowls are also great for make-ahead lunches. Portion everything cold, and reheat the pork separately if you want to keep the greens crisp.
Breakfast Moves: Meat in the Morning
Leftover smoked pork doesn’t need to wait for dinner. It holds up surprisingly well at breakfast — especially if you’re the kind who wants something savory to start the day.
- Tenderloin hash: Dice it up with potatoes, onions, maybe a little bell pepper. Pan-fry until crispy and top with a runny egg.
- Breakfast sandwich: Sliced pork, a fried egg, some melted cheese, hot sauce, and an English muffin or biscuit. It’s the kind of thing you think about before you’ve even had coffee.
XI. Variations: Flavor Spins That Keep It Fresh
Smoked pork tenderloin is built on a simple idea — mild, tender meat with just enough fat to stay juicy. That makes it the perfect blank slate for flavor. You can keep the standard salt-and-smoke approach on rotation, but once you’ve done it a couple times, it’s worth mixing things up. Different spice blends, marinades, or post-smoke sauces can give the same cut a totally new personality without changing your cooking process much at all.
Here are four variations that’ve been tested, repeated, and passed around more than a few backyard tables:
Spicy Cajun
This one’s bold, earthy, and just hot enough to notice — especially good if you’re working with hickory or pecan wood.
- Rub: smoked paprika, cayenne pepper, thyme, black pepper, garlic powder, salt, and a pinch of onion powder.
- Optional: Add a little brown sugar to balance the heat — it’ll help form a light crust, especially if you’re searing or finishing hot.
Serve it sliced over dirty rice, with grilled corn, or just on a plate with pickles and cornbread. If you’re glazing, a Louisiana-style hot sauce mixed with butter and honey works as a fast finishing drizzle.
Sweet and Savory
This version leans into the pork’s natural sweetness without tipping into candy territory.
- Rub: brown sugar, cinnamon, crushed fennel seed, a little clove if you want something deeper.
- Optional glaze: Simmer apple cider, a spoon of Dijon, and a splash of apple cider vinegar until slightly thickened. Brush on during the final 10 minutes or serve warm on the side.
Pairs well with roasted apples, sweet potatoes, or a buttery grain like farro. If you want to dress it up, throw some toasted walnuts or pecans into the mix.
Asian-Style
Smoked pork meets umami and a touch of sweetness. The marinade does most of the work — the rest is just slicing and plating it clean.
- Marinade: soy sauce, honey, sesame oil, rice vinegar, grated garlic and ginger. Let it soak for 2–4 hours before drying it off and smoking as usual.
- Post-smoke: Top with scallions, toasted sesame seeds, and a few drops of sriracha or chili crisp.
Serve it sliced thin over rice, tucked into lettuce wraps, or chilled the next day with soba noodles and a citrus-soy dressing. It’s light, fragrant, and holds up even cold.
Mediterranean
This one skips the sweetness and leans bright, herbaceous, and a little citrusy — perfect for summer grilling or serving with fresher sides.
- Rub: dried oregano, crushed garlic, lemon zest, kosher salt, and black pepper.
- Optional baste: Mix olive oil, lemon juice, and chopped parsley, and brush it on during the last few minutes of the cook or right after resting.
Serve it with tzatziki, warm pita, cucumber salad, or roasted eggplant. It’s lighter, cleaner, and a break from the usual barbecue vibe without sacrificing flavor.
The core cook doesn’t change — smoke it to temp, rest it, slice clean. But with just a tweak in the spice drawer or a short soak in a marinade, pork tenderloin shifts lanes fast. Try one of these, then start riffing. Once you’ve got the base dialed, there’s no reason to eat the same version twice.
XII. What to Do with Leftovers: Don’t Let It Go to Waste
If you’ve cooked pork tenderloin right, you’ll want to make the most of every last slice — and luckily, it’s one of the easiest proteins to repurpose. Because it’s lean, clean-flavored, and takes on other flavors well, it slides right into meals that don’t feel like a repeat of last night. And unlike heavier cuts, it holds up just fine cold or reheated, so you’ve got options whether you’re reaching into the fridge for lunch or building something bigger.
Cold Sandwiches with a Kick
Start with thinly sliced leftover pork, chilled. Pile it onto a crusty baguette, ciabatta, or rye. From there, go sharp and tangy:
- Whole grain mustard or horseradish cream
- A spoon of apple or tomato chutney
- Pickled onions or arugula for bite
It’s quick, no-heat-required, and somehow feels like more than just leftovers — especially if the bread’s toasted or pressed.
Fried Rice or Stir-Fry Boost
Dice up the pork and toss it into a hot pan with day-old rice, scrambled egg, scallions, and whatever vegetables are in reach. That hint of smoke from the pork cuts through soy sauce and sesame oil in the best way — no need for extra seasoning unless you’re layering in spice or acid.
Same goes for a stir-fry. Quick sear the meat at the end so it doesn’t dry out, then coat in sauce with crisped vegetables. Pork tenderloin was built for this kind of fast reuse.
Soups and Stews That Hit Harder
Leftover pork gives body to brothy dishes — especially if you cut it thin and add it toward the end so it doesn’t overcook.
- Add to a bean soup, like navy or cannellini, with herbs and a squeeze of lemon.
- Toss into a lentil stew, especially one with carrots, cumin, and a splash of vinegar.
- Drop slices into a bowl of ramen or udon — pork, scallions, soft-boiled egg, done.
The smoke acts like a shortcut to flavor, especially in simple broths.
Cuban-Style Hash
Chop the pork, crisp it up in a pan with diced potatoes, onions, and peppers, then finish with lime juice and mojo sauce(or just a splash of orange juice, garlic, and oil if you don’t have the real thing). Top it with a fried egg and call it breakfast, brunch, or a recovery meal with purpose.
Bottom line? Leftover pork tenderloin is never just leftovers. It’s pre-cooked flavor ready to flex. Think of it as a base ingredient — not an afterthought — and you’ll find a dozen ways to bring it back to life without eating the same plate twice.
XIII. Storing and Reheating Without Losing the Magic
Smoked pork tenderloin doesn’t give you much — one cut, maybe a pound or so — but when you’ve got leftovers, they’re worth treating right. Reheating lean meat is always a bit of a tightrope. Too much heat or too little moisture, and all that tender, juicy goodness you worked for gets cooked out the second time around. So if you want to enjoy round two without disappointment, storage and reheat method both matter.
Storage Tips: Keep It Loose, Not Packed
Start by slicing the tenderloin before storing. Whole pieces take longer to reheat and can dry out in the middle while the outside overcooks. Slice it into medallions or thin cuts, then store them in single layers — or at least with parchment or wax paper between layers so they don’t clump and fuse together.
Portion into airtight containers with a little of the resting juices or glaze, if you’ve got any. That liquid helps keep moisture in and adds back flavor when reheated.
Fridge shelf life: 3 to 4 days, tops.
Freezer: Wrap tightly and freeze flat. Good for 2 to 3 months, though texture softens a bit on thawing.
Reheating Methods That Work
- Low Oven (275–300°F): Lay the slices in a small baking dish, add a splash of broth, cider, or water, cover with foil, and warm until heated through — about 10–15 minutes. This keeps it moist and prevents the meat from tightening up.
- Skillet on the Stove: Heat a little oil or butter, add a splash of liquid (even just water or pan sauce), and reheat gently over medium-low heat, flipping once. Cover with a lid or foil if possible to trap steam. Done in 5–8 minutes, and you keep the crust if it had one.
- Sous-vide (if you’re fancy): Bag the slices, drop into a water bath at 130–135°F, and let it warm slowly for about 30 minutes. It’ll come out like it never hit the fridge.
What to Avoid
- Microwaving on high heat: Sure, it’s fast — but it’s also a direct route to rubbery, uneven meat. If you’re using a microwave, lower the power to 50%, cover with a damp paper towel or microwave lid, and heat in short bursts, flipping halfway through.
- Leaving it uncovered: This dries out the meat whether you’re reheating in the oven, pan, or microwave. Always cover — with foil, a lid, or even a plate — to trap moisture.
- Reheating too long: Once it’s hot, it’s done. Lingering heat only squeezes the juice out. Warm it gently, then pull it off.
Handled right, leftover tenderloin doesn’t feel like leftovers. It just feels like dinner came together faster. All you’re doing is reawakening what you already cooked — not re-cooking it. Stay gentle, keep it covered, and treat it with the same care the second time around.
XIV. Wood Selection Deep Dive: Pairing Smoke with Pork
Pork tenderloin doesn’t need to be smoked into submission. It’s a lean, mild cut — the kind that plays best with smoke that adds depth, not weight. That means your choice of wood matters more than you might think. Go too light and you won’t taste it. Go too heavy and you’ll drown the pork in bitter creosote and regret. The goal is balance — smoke that supports the seasoning and meat, not one that takes over the whole plate.
Best Woods: Apple, Cherry, and Pecan
Start with the fruit woods — they’re the safe bet, and for good reason.
- Apple: Subtle, slightly sweet, clean-burning. It’s the go-to for a light smoke that gently lifts the flavor of the meat without shouting. Works especially well with sweet rubs or glazes.
- Cherry: A little bolder than apple, with a redder tone and slightly tangier finish. It gives the meat a beautiful color and a little more presence in the flavor department without being aggressive.
- Pecan: Richer, earthier, still on the mild side but with more of a nutty backbone. It’s a good bridge between fruit woods and stronger stuff like hickory — especially if your rub leans savory or herbal.
All three of these woods have one thing in common: they don’t overpower lean pork. They enhance it. That’s what you want.
What to Avoid: Heavy Smoke Like Mesquite or Full Hickory
It’s not that you can’t use stronger woods — it’s that pork tenderloin cooks fast, and those heavier smokes don’t always have time to mellow out. If you go full mesquite, expect the smoke flavor to punch first and stick around longer than the meat itself. Same goes for 100% hickory — it can come off sharp, especially if the fire runs hot or the wood isn’t fully seasoned.
If you really like a stronger smoke profile, fine — just use less wood or cut it with something lighter. A chunk of hickory mixed with apple can work. Mesquite, though? Save it for brisket or beef ribs. It’s too much muscle for this cut.
Mixing Woods: Layering Flavor the Right Way
You don’t have to stick with just one wood. Mixing is a smart move — especially if you want complexity without overwhelming the pork.
- Try apple + cherry for a clean, slightly sweet blend with a red hue to the bark.
- Go pecan + apple if you want something a little deeper, especially with a savory rub or glaze.
- Hickory + fruit wood works, but go easy on the hickory — one chunk to two of apple is usually enough.
Think of it like seasoning. You’re not just throwing flavor at the meat — you’re balancing smoke, heat, and time to build something layered, not loud.
Bottom line: fruit woods are your best bet with tenderloin. They add character without stealing the spotlight. Go light, stay clean, and if you mix — mix with purpose. The smoke should support the cook, not shout over it.
XV. Troubleshooting: Common Pitfalls and How to Fix Them
Pork tenderloin isn’t a forgiving cut. It cooks fast, dries out quick, and doesn’t carry much fat to mask mistakes. When things go sideways, they go fast — but most of the issues are preventable if you know what to watch for. Here’s a breakdown of the usual suspects and how to clean up the damage (or better yet, avoid it next time).
Dry Meat
What went wrong:
- You cooked it past 145°F, plain and simple.
- You skipped the rest, and all the juices hit the board instead of staying in the meat.
- You didn’t brine or tie the tenderloin, so the thin end cooked faster and dried out while the thicker side was still coming up to temp.
How to fix it:
Once it’s dry, there’s no undoing it — but you can cover it with a warm sauce, wrap slices in foil with broth and steam gently to rehydrate, or chop it into hash or sandwiches with something creamy or fatty to bring it back to life. Next time, use a thermometer and pull it at 140°F. Let it rest. And if the shape is uneven, tie it up before it goes on the smoker.
Bitter Smoke
What went wrong:
- You used wet wood or unseasoned chunks that smoldered instead of burning clean.
- You ran a dirty fire — too much fuel, not enough air. That gives you thick, gray smoke instead of thin blue smoke.
- You closed off your vents, choked the oxygen, and let soot build up.
How to fix it:
Trim off the blackened surface if it’s inedible. Serve with sharp sides (pickles, slaw, citrusy greens) to cut through the bitterness. Going forward, burn seasoned, dry wood, keep airflow steady, and don’t overload the firebox. Good smoke is clean and almost invisible — not a white-out.
Uneven Cooking
What went wrong:
- The tenderloin was tapered and untied, so the skinny end overcooked.
- Your smoker had a hot zone, and you didn’t rotate or reposition the meat.
- You didn’t let the meat warm up before cooking — cold centers take longer, which throws off timing.
How to fix it:
Use trussing or just tuck the tail underneath and tie it down. Let the meat sit at room temp for 30–45 minutes before it hits the heat. And if your smoker’s uneven — and most are — rotate halfway through or use a water pan to even things out. You can also double up on temperature probes if you want to track both ends.
Bland Flavor
What went wrong:
- The rub was too light, or you skipped brining and went in cold.
- The smoke didn’t have enough time to stick — either from a short cook or a wet surface.
- You didn’t finish it with a glaze, sauce, or acidic pop to brighten it up.
How to fix it:
Chop it for tacos or sandwiches and dress it post-cook — chimichurri, mustard, pepper jam, even a splash of citrus or hot sauce can bring it back to life. For the next round, dry the surface before smoking, season aggressively, and don’t be afraid to layer flavor: brine → rub → smoke → glaze.
Tenderloin’s not tricky — it’s just particular. The mistakes don’t come from trying too hard. They come from rushing or assuming it’ll behave like a fattier cut. Keep your prep clean, your fire steady, and your thermometer close, and you won’t have to troubleshoot anything. But if something does go sideways? At least now you’ve got a playbook.
XVI. Smoked Pork Tenderloin FAQ
You’ve got the method down, the prep handled, and maybe even a go-to rub in rotation — but there are always those lingering questions that come up in the middle of a cook or right before you fire up the smoker. Here’s a quick-hit FAQ with real answers, no fluff, no hedging.
Can I smoke it from frozen?
Technically? Sure. Should you? No. Smoking frozen pork tenderloin is a recipe for uneven cooking — the outside will sit in the danger zone (40–140°F) too long while the middle thaws. That opens the door to bacterial growth and messes with texture. Always thaw fully in the fridge, then bring to room temp for 30–45 minutes before cooking. It’s worth the wait.
What if I only have charcoal and no smoker?
No problem. Turn your charcoal grill into a smoker with a two-zone setup: coals and wood on one side, pork on the other. Keep the vents partially open and the lid closed, and monitor temp — you’re aiming for 225–250°F indirect heat. Toss in a few wood chunks (apple or cherry) on the coals, and you’ll get smoke just fine. It’s a bit more hands-on, but it works.
Can I brine and rub?
Absolutely — in fact, it’s one of the best ways to layer flavor. A wet or dry brine seasons the inside, while the rub handles the surface. Just pat the meat dry thoroughly after brining, especially if it’s been in a wet solution. That way the rub sticks and you still get bark. Don’t overdo the salt in the rub if your brine was heavy — balance matters.
What’s the best internal temp for slicing thin?
Pull the pork at 140°F, rest to 145°F, then slice. At that temp, the meat stays juicy and tender, and it’ll hold up well even if you’re going thinner — say ¼-inch slices for sandwiches or rice bowls. Cooler than that and it’s harder to slice clean; hotter and you risk drying it out during rest or reheating.
Is it safe to eat slightly pink pork?
Yes. The USDA revised the safe temp for whole cuts of pork to 145°F with a 3-minute rest. At that temp, pork can still have a rosy center, especially near the middle of a tenderloin. That’s not raw — it’s just cooked right. As long as it hits temp and rests, pink is fine. Welcome, even.
Bottom line: when pork tenderloin is cooked with control, it’s safe, tender, and flexible. Stick to the fundamentals — clean prep, good temp control, and a thermometer — and you won’t need to second-guess anything.
XVII. Final Thoughts: Why This Cut Earns a Spot in Your Smoker Lineup
Pork tenderloin gets overlooked — and that’s a mistake. Too many people treat it like filler: the thing you cook when you don’t have time for brisket, or when ribs feel like too much. But that mindset misses the point. This isn’t just a fast cut. It’s a flexible one — lean, tender, and surprisingly capable of carrying smoke, spice, and sauce in ways that punch way above its weight.
Done right, smoked pork tenderloin is a legit main event. It doesn’t take six hours. It doesn’t need a gallon of mop sauce or a pile of bark to be impressive. It just needs smart prep, clean seasoning, a controlled cook, and a little respect on the thermometer. And in return, it gives you something that’s easy to serve, easy to repurpose, and hard not to like.
It works for weeknight dinners and backyard cookouts. It plays nice with bold flavors and subtle ones. It makes great sandwiches, great leftovers, and — when sliced and plated right — it even holds its own on the kind of table where you’d usually expect something with a bone.
So yeah — it’s not brisket. It’s not ribs. But pork tenderloin smoked just right deserves a permanent spot in your rotation. Not as a backup. Not as a shortcut. As the main dish that proves you don’t need a massive cut to make a serious impression.