Best Way to Bake DiGiorno Pizza: Step-by-Step Guide

Hi. I’m Chef Marcus. And if I had a dollar for every time someone told me they “followed the box” and still ended up with a pizza that was half lava, half ice rink, I’d be opening a wood-fired slice joint in the Dolomites. But I’m not. I’m here, and I want to fix this.
See, frozen pizza isn’t the problem. It’s how we treat it — like it’s some desperate plan B for when dinner dreams collapse. But here’s the thing: if you just give DiGiorno a little respect, it will absolutely return the favor. I’m talking crispy crust, molten cheese, and a bite that doesn’t sag like a sad paper plate.
And no, I’m not going to tell you to buy a pizza stone the size of a manhole cover. You don’t need a convection setting, a calibrated laser thermometer, or anything that looks like it came from an episode of Top Chef. You need heat. You need timing. And you need to stop throwing the thing straight onto the rack like you’re trying to punish it.
Let’s talk about what DiGiorno really is. It’s not delivery — but it is engineered. That crust? It’s been pre-proofed, frozen at just the right stage, and designed to rise under specific conditions. That cheese melt? Calibrated to bubble before the sauce drowns it. There’s real design here — and when you ignore that, you get a scorched disc with raw dough underneath.
- Understanding the Pizza
- Equipment: What You Need (and What You Really Don’t)
- Temperature Settings: What’s Best?
- Step-by-Step: How to Bake a DiGiorno Pizza Without Screwing It Up
- Variations: Smart Tweaks, Bold Add-Ons, and What Not to Do
- Storage and Reheating Tips
- What to Do with Leftovers, Crusts, and Those Last Weird Bits
- Frequently Asked Questions
- Final Thoughts: Frozen, But Far From Forgettable
So let’s do it right. Let’s talk rack placement, surface choices, and what to do when your oven says 400°F but means 375°F on a good day. Let’s break down crust types — because yes, DiGiorno croissant crust needs a totally different strategy than rising crust, and no, it’s not “just pizza.”
This isn’t about making DiGiorno into something it’s not. It’s about unlocking the best version of what it already is. Whether you’re feeding a group, feeding yourself, or just too tired to boil pasta, this pizza deserves a little intention.

I’ll show you how to cook it so it comes out proud. No soggy middle. No crust that could knock out a raccoon. Just pizza that tastes like you meant it.
Understanding the Pizza
Let’s start with a simple question: what the hell is going on inside a DiGiorno pizza?

Because it’s not just a frozen wheel of bread, sauce, and cheese. It’s a system. Every part — the crust, the toppings, even the order things are layered — is there for a reason. So if you want that golden rise, that browned cheese, that crispy base that doesn’t go limp in your hand like a paper towel commercial, you need to understand how this thing cooks.
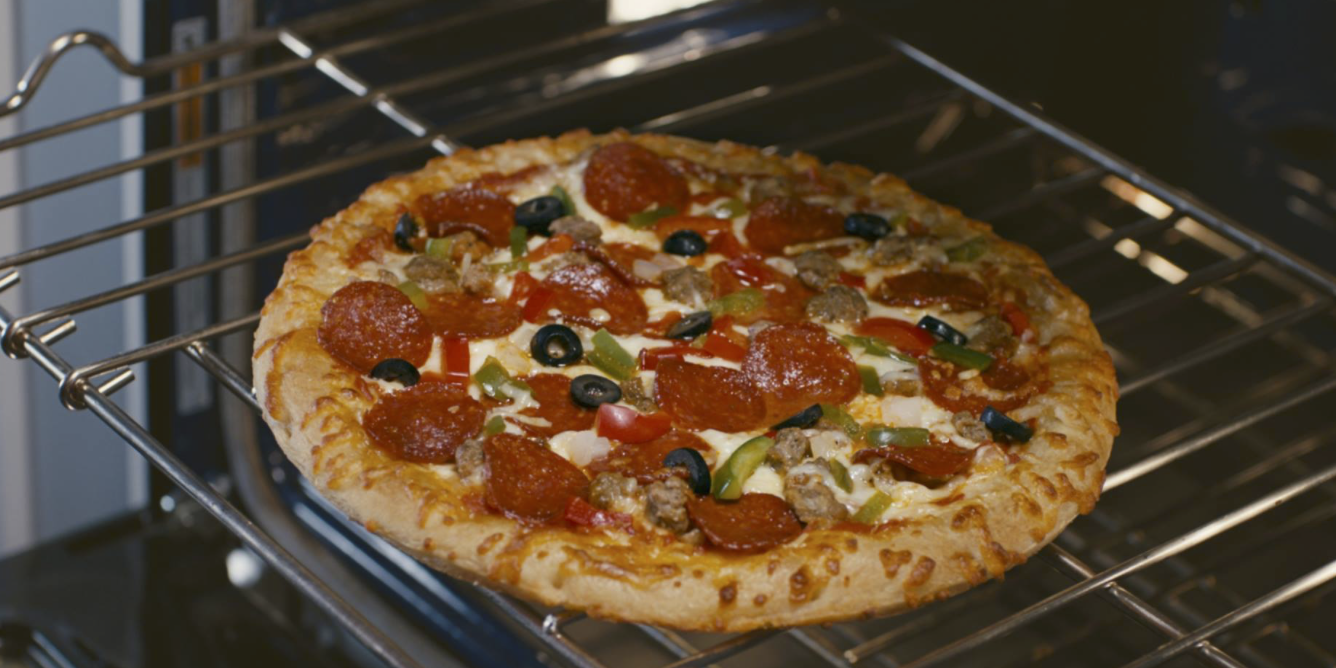
First, the crust. DiGiorno’s most famous for the Rising Crust — that thick, doughy base that puffs up in the oven like it’s got something to prove. That rise isn’t magic. It’s a very specific combo of yeast, air, and hydration, frozen at just the right moment. When it hits a hot oven, it springs back to life — but only if the heat hits it hard and evenly. That’s why half-baking it on a cold pan or letting it thaw on the counter is a one-way ticket to spongeville.
Then there’s the cheese — usually a blend of mozzarella and “cheese product,” which sounds like an insult but actually helps it melt and stretch in a predictable way. You’ll see some parts in shreds, some in cubes — again, that’s intentional. The shreds melt fast for coverage. The cubes hang back and give you those dreamy little cheese bubbles. Burn them, and you lose that whole show.
And the toppings? They’re flash-frozen to cook with the crust — not before it, not after. That means if you go rogue and throw extra mushrooms or frozen pepperoni on top five minutes in, you’re throwing the whole schedule off. The crust might be done while your bonus toppings are still icy, or worse, waterlogged and steaming the dough from above.
Bottom line: DiGiorno isn’t just a pizza. It’s a balance act in a box. You can’t treat it like a toaster pastry and expect restaurant results. But you can treat it like what it is — a clever piece of food engineering — and get something that’s damn satisfying. You just have to play by its rules. Or at least understand them before you start breaking them.
Next, I’ll walk you through exactly what you need to cook this thing properly — and what you really, really don’t.
Equipment: What You Need (and What You Really Don’t)
Let’s not overcomplicate this. We’re not baking sourdough. We’re not spinning dough in the air like we’re auditioning for a pizzeria TikTok. We’re heating a frozen pizza — but we’re doing it right. That means you need a few tools. Not all the tools. Just the right ones.
Here’s the gear that actually matters:
- A real oven. Not an air fryer. Not a toaster oven. Not whatever “smart countertop appliance” your cousin swears by that plays Spotify while it overcooks everything. You need a conventional oven with top and bottom heat. That’s it. If yours runs hot or cold (and it probably does), invest ten bucks in an oven thermometer. It’s the difference between “crispy crust” and “well, it’s edible.”
- A baking surface — sometimes. Now this depends on the crust. For Rising Crust, DiGiorno says straight on the rack. And that’s mostly fine — if your oven racks are clean and level and your life is blessed. But if your last pizza sagged between the grates like a hammock and bled cheese into your broiler tray, consider a preheated baking sheet or pizza stone. Thin Crust? Needs a solid surface. Croissant Crust? Must be baked on a tray. Stuffed Crust can go either way, but I lean toward a sheet for even browning.
- A spatula. Not glamorous, but necessary. You’ll want to lift the pizza and check the bottom before you pull it out. Golden? Good. Pale and floppy? Give it a few more.
- Tongs or a pizza peel, if you’re feeling fancy. Not required, but if you’ve ever tried to shimmy a half-baked pizza off a rack with your bare hands and a prayer, you already know.
Now, let’s talk about what you don’t need:
- Microwave. No. Never. Not even for “just one slice.” That’s how you get rubber crust and steaming sadness.
- Foil. Tempting, I know. But foil reflects heat and messes with the bottom crust. If you need easy cleanup, go parchment — or clean your tray like a grown-up.
- Convection setting. It sounds fancy, but it can dry out the top before the middle’s done. Unless you really know your oven, stick with regular bake.
This isn’t about perfection. It’s about control. The right tools don’t make you a better cook — but they keep you from making the same mistakes over and over while wondering why your pizza still sucks.
And now that you’ve got your setup, let’s get into what really separates a soggy mess from a golden, cheese-laced slice you’re proud to eat standing over the sink. Temperature, time, and technique — coming up next.
Temperature Settings: What’s Best?
This is where most frozen pizzas get betrayed. Not by ingredients. Not by bad intentions. But by a half-hearted preheat and a blind faith in the “about 22 minutes at 400°F” scrawled on the box like it was handed down from Mount Sinai.
Here’s the truth: temperature isn’t just about melting cheese and warming dough. It’s about how the crust activates. How the moisture escapes. How the toppings finish with the base instead of turning into lava while the bottom stays limp.
Different DiGiorno crusts demand different tactics. If you treat Croissant Crust like Thin Crust, it’ll burn. If you treat Rising Crust like Thin Crust, it’ll stay gummy in the middle like undercooked cinnamon rolls. You have to cook for the crust.
So let’s break it down:
Rising Crust
- Temp: 400°F (204°C) — full preheat, no shortcuts
- Surface: Directly on the middle oven rack or, better yet, a preheated baking sheet
- Time: 22–25 minutes
- Watch for: A puffed, evenly golden outer ring and bubbling cheese with slightly charred spots
- Chef’s note: If the bottom still feels doughy at 20 minutes, don’t panic — that’s normal. The crust needs all 22+ to fully rise and brown.
Stuffed Crust
- Temp: 400°F (204°C)
- Surface: I prefer a baking sheet — catches leaks and helps the cheese crust stay intact
- Time: 20–24 minutes
- Watch for: Cheese just starting to ooze at the edges, golden-brown crust, no pale zones underneath
- Chef’s note: If your oven runs hot and the top starts browning too fast, tent loosely with foil around the 15-minute mark. The cheese in that crust wants to blow its lid early — keep it in check.
Croissant Crust
- Temp: 375°F (190°C) — lower temp, longer bake
- Surface: Always a baking sheet. This one can’t go straight on the rack unless you enjoy scrubbing butter runoff from your heating element
- Time: 25–28 minutes
- Watch for: Flaky, golden layers that puff and separate slightly, with no raw dough patches under the center
- Chef’s note: Resist the urge to crank the heat. You want crisp and flaky — not scorched and soggy.
Thin Crust
- Temp: 400°F (204°C)
- Surface: Baking sheet or preheated pizza stone — the rack alone won’t support it
- Time: 14–17 minutes
- Watch for: Crisp edge, browned cheese, and a crust that doesn’t bend like a playing card
- Chef’s note: For maximum crunch, preheat the tray or stone for 10 minutes before sliding the pizza on.
Bottom line? Don’t trust your box. Trust your nose. Trust your spatula. Lift the edge. Check the bottom. Give it the attention it deserves for the last few minutes of baking, and it’ll reward you with a crust that holds up and cheese that stretches without slumping into regret.
Coming up next: the step-by-step — from freezer to plate, and all the little moments that make the difference between “it’s fine” and that’s actually kind of amazing.
Step-by-Step: How to Bake a DiGiorno Pizza Without Screwing It Up
Alright. You’ve read the back of the box. Maybe even memorized it. But if it were that simple, we wouldn’t be here. Because “Bake at 400°F for 22 minutes” doesn’t tell you what to do when your cheese burns before the crust sets. Or when the bottom’s still pale and flabby after the timer beeps. Or how to avoid slicing into a molten center with crust edges hard enough to cut drywall.
That’s what this part is for. We’re walking it through, start to finish — the way I do it at home when I want a frozen pizza that doesn’t taste like one.
Step 1: Preheat Like You Mean It
Not “turn on the oven and throw the pizza in while it warms up.” That’s how you get a sad, gray undercrust. I mean a fullpreheat — give it at least 10 extra minutes after the oven beeps. Why? Because your oven lies. The air might hit 400°F, but the racks and walls haven’t caught up yet. And that’s what crisps your crust.
If you’re using a baking sheet or stone, get that in there now. Cold sheet = soggy bottom.
Step 2: Unwrap with Care
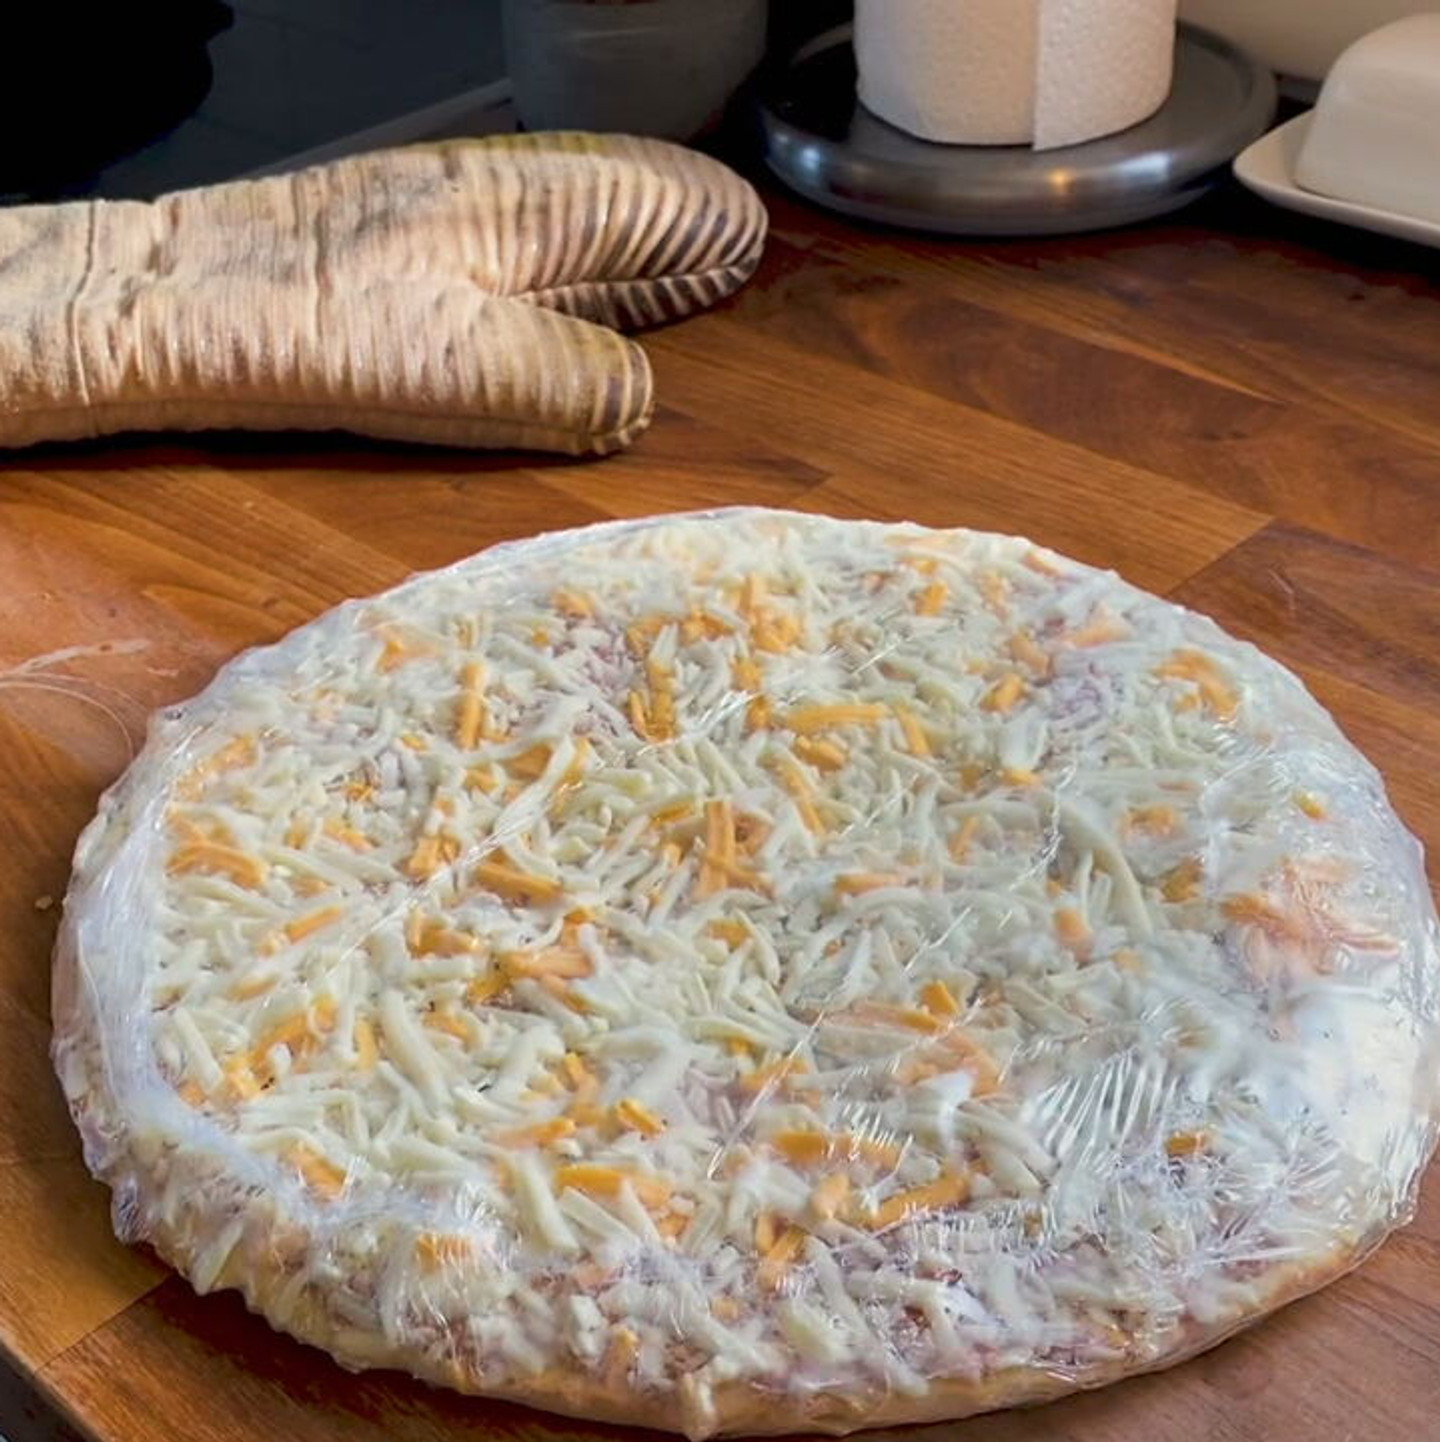
Take the pizza out of the box, out of the plastic, off that weird cardboard circle. And keep it frozen. Don’t thaw. Don’t let it sit on the counter while you open the wine. Thawed pizza throws off the baking balance — you’ll get scorched cheese on top before the crust finishes rising.
If you want to add toppings (and I’m not mad at that), do it now. But be smart — don’t pile on wet veggies or frozen chunks unless you’ve prepped them first. Damp toppings steam the crust and flood the cheese. Pat them dry or give them a quick sauté. Trust me, your future slice will thank you.
Step 3: Bake, Don’t Walk Away
Slide the pizza in — directly on the middle rack or onto your preheated tray/stone, depending on the crust. Set the timer for the minimum time listed, not the max. That’s your first check-in.
Now here’s the key:
- Rotate halfway. Ovens have hot spots. Unless you live inside a perfectly calibrated test kitchen (and if you do, congrats), your pizza needs a mid-bake spin. Use tongs, not your hands.
- Don’t trust the timer. When the beep hits, lift the edge with a spatula. Check the bottom. Does it look like toast? Golden and crisp? Or is it pale like a sad tortilla? If it needs more time, give it 2–4 minute intervals — but keep checking.
Step 4: Rest, Slice, Serve
Pull it when it looks done, not just because the timer says so. Let it sit for 3 to 5 minutes on a cutting board or cooling rack. That short pause makes the difference between molten roof-of-mouth damage and perfect slice structure. The cheese settles. The crust firms up. It’s worth it.
Then slice it. Use a pizza cutter if you have one, or kitchen shears if you’re chaotic like me. And eat it how you like — off a plate, off the tray, straight from the board over the sink like a degenerate with taste.
Variations: Smart Tweaks, Bold Add-Ons, and What Not to Do
Let’s say you’ve mastered the bake. The crust hits that perfect crisp-meets-chew line. The cheese bubbles like a lava lamp in all the right places. You’ve done it — a frozen pizza that actually tastes like dinner on purpose.

But maybe now you want more. A little edge. A twist. Something that says, “Yeah, it came out of a box — and then I made it better.” Good. You should. DiGiorno holds up to upgrades better than most frozen pies, as long as you don’t mess with the fundamentals. So let’s talk about what works, what doesn’t, and what sounds clever until it melts into chaos.
The Right Way to Add Toppings
Here’s the rule: dry and light. Frozen vegetables? Thaw and pat them down like you’re prepping them for a passport photo. Too much moisture = steamed crust. Fresh mushrooms? Slice thin, sauté quickly. Pepperoni? Sure — but don’t pile on five layers unless you like grease puddles.
If you’re adding:
- Veggies: Pre-cook or pat dry. Add before baking.
- Extra cheese: Add halfway through baking so it melts without choking the crust’s airflow.
- Herbs: Always fresh, always at the end. Basil in a hot oven becomes a bitter mess.
My go-to move? A little sautéed garlic-spinach dropped on a slice post-bake with a hit of chili oil. Sounds fancy. Takes four minutes. Feels like a chef cooked it.
The Things to Never, Ever Do
- Don’t add raw meat. Just don’t. Your crust will be ash before that sausage is safe to eat.
- Don’t pile on wet sauce. Alfredo, BBQ, buffalo — if you must, use a light drizzle after baking. Otherwise, it floods the cheese and turns the top into soup.
- Don’t crack an egg on it and call it breakfast. That’s a brunch fantasy that ends in half-cooked yolk and wasted pizza.
The Finishers: How to Make It Taste Intentional
This is the part no one talks about, but it’s where a frozen pizza becomes your pizza.
- Hot honey. Drizzle it on a pepperoni slice — sweet, spicy, perfect.
- Crushed red pepper, chili oil, or Calabrian chili paste. All good. Add after slicing.
- Garlic butter edge brush. Mix melted butter with garlic powder, brush the crust right out of the oven. Instant upgrade.
- Arugula or baby spinach. Toss with lemon and olive oil, pile on top — adds bite and balance.
None of this is about hiding the fact that it came from a box. It’s about making that box pull its weight. About treating DiGiorno like a platform, not a product. You’re not faking restaurant pizza here — you’re building your own lane.
Next, we’ll talk leftovers. How to store slices so they stay crisp, reheat like you mean it
Storage and Reheating Tips
Because cold pizza is a vibe, but bad cold pizza is just punishment.
Let’s say you didn’t finish the whole pie — which, first of all, restraint like that deserves a nod. But now you’ve got three, maybe four slices left, and you’re staring at them like they’re a problem for Future You. Fine. Let’s do Future You a favor.
Because DiGiorno doesn’t reheat like fresh pizza. That crust — especially Rising or Stuffed — doesn’t bounce back if you microwave it straight. It goes limp in the middle, rubbery on the edges, and the cheese melts into a greasy smear that tastes like regret.
Here’s how you keep leftovers tasting like they were worth saving.
First: Store Like You Care
Once the pizza’s cooled down a bit (not steaming — just not hot enough to melt your Tupperware), wrap individual slices in parchment or wax paper. Then seal them in a zip-top bag or airtight container. Don’t just toss the whole box back in the fridge — the cardboard sucks up moisture, the pizza dries out, and now you’ve got crust that snaps like a cracker and cheese that tastes like fridge air.

Fridge life: 3 to 4 days
Freezer life: Up to a month, wrapped and sealed tight
Freezer tip: Stack slices between sheets of parchment and lay flat. Bonus points if you label it. “What the hell is this frozen triangle?” is a question you don’t want to answer at 11 p.m.
Now: Reheat Like a Pro
You’ve got two main lanes: fast or crispy. Choose your fighter.
1. Skillet Method (Crispy AF)
- Toss a slice into a nonstick skillet, cold.
- Set heat to medium-low.
- Cover loosely with a lid to trap steam and help the cheese melt.
- 5–6 minutes later, the bottom’s crisp and the top is soft without being gooey.
2. Oven or Toaster Oven (If You’ve Got Patience)
- Preheat to 375°F (190°C).
- Place slices directly on a baking sheet or foil.
- Bake for 8–10 minutes, until it looks alive again.
- Pro move: add a tiny splash of water on the pan away from the slice and tent loosely with foil — gentle steam, no dryness.
3. Microwave (Emergency Only)
- Place the slice on a paper towel.
- Microwave 30–45 seconds.
- Immediately transfer to a dry pan or toaster oven to crisp the bottom — if you can be bothered.
The goal here isn’t just temperature. It’s texture. That’s what separates “leftovers” from “forgotten pizza.” Done right, that reheated slice gets a second wind — and maybe even earns a seat next to its fresh-baked siblings.
Next up: what to do with that last bit of crust, the lonely slice, or that extra sauce pooling in the box. Because around here, we don’t waste pizza — we upgrade it.
What to Do with Leftovers, Crusts, and Those Last Weird Bits
Here’s a scenario you’ve probably lived through: you open the fridge the next day and find one slice left. It’s curled at the edges, the cheese looks like it gave up halfway, and there’s a half-ounce of congealed sauce sitting in a takeout container you forgot to rinse. You could throw it all out. Or — hear me out — you could turn it into something surprisingly solid.
This is where we stop treating leftovers like trash and start seeing them for what they really are: pre-loaded flavor bombs with a second life.
1. Leftover Sauce? Cook With It
If your pizza came with one of those mini sauce cups (looking at you, Stuffed Crust Supreme), and you didn’t use it all, do not throw it away. It’s basically concentrated umami — salty, tomato-forward, and ready to work.
Here’s what I do:
- Toss it into scrambled eggs. Add a spoonful while the eggs are halfway set. Suddenly you’ve got breakfast tacos with a DiGiorno twist.
- Heat it and dip crust ends. Add a splash of olive oil and crushed red pepper. Warm it for 20 seconds. Now you’ve got legit dipping sauce.
- Stir into soup or beans. That little blast of acid, salt, and fat wakes up a can of black beans like you wouldn’t believe.
2. Crust Ends = Croutons Waiting to Happen
If you’ve got a pile of crust nubs and don’t feel like gnawing through them cold, chop them up and hit them in a skillet with a little oil and garlic. Boom — pizza-flavored croutons. Toss them on a salad or soup. Or eat them straight like some kind of rebellious breadstick enthusiast. No one’s judging you.
3. Remix the Lone Slice
You’ve got one slice. It’s not a meal. But it can be:
- Chop it up, fold it into an omelet. Yes, really. The cheese melts, the crust softens, and it’s suddenly something you’d pay $14 for at brunch.
- Use it in a grilled cheese. Take the cheese and toppings off the crust, sandwich it between two slices of bread, grill with butter. A Frankenstein move? Absolutely. But the good kind.
- Tear it into a bowl of tomato soup. It soaks. It melts. It disappears in the best way.
4. Got Nothing But Crumbs?
That’s seasoning. Mix those up with a little olive oil and chili flakes and toss over roasted veggies. Or use them as a topping on mac and cheese. DiGiorno dust — trademark it, bottle it, live better.
Point is, there’s flavor hiding in what looks like scraps. Frozen pizza might start in the freezer, but it doesn’t have to end in the trash. Even the crumbs can work if you know what to do with them.
Next — one final round of questions. You’ve got them, I’ve heard them. Let’s clear up the last-minute panic and make sure your next bake doesn’t end in disappointment or charred regret. FAQs coming up.
Frequently Asked Questions
Because the box doesn’t answer everything — but I do.
You’ve followed the steps. Maybe even nailed the bake. But then come the questions — the “wait, is this normal?” stuff that hits halfway through cooking or when you’re chewing on a slice that’s just off. I’ve heard them all. Here’s what you actually need to know.
“Can I bake two pizzas at once?”
You can, but should you? Only if your oven’s big enough to let them breathe. One on the middle rack, one below — staggered, not stacked. And swap their positions halfway through. Just know: two pizzas will drop your oven temp fast. Add a couple extra minutes to each one and don’t walk away.
“Why is my crust burnt but the middle’s still soft?”
Classic too-much, too-soon. Your oven’s running hot, or your pizza was too close to the bottom heat source. Next time, use the middle rack, not the lower one. And don’t go above 400°F unless you’re doing Thin Crust and watching it like a hawk.
“Can I add more cheese before baking?”
Yes — but sparingly. Overload the top and you trap steam, which softens the crust and floods the toppings. Want more cheese? Add it halfway through the bake. That’s when the original layer is already melting and the crust has set its shape.
“Why is the cheese bubbling over and burning onto my oven floor?”
Because you went rogue. Either you added too much, or it shifted in the oven. Use a baking sheet with a lip next time, or place a piece of foil under the rack (not under the pizza). Clean ovens are great. Cheese-scented fire alarms, not so much.
“Is it safe to microwave leftover slices?”
Safe? Sure. Satisfying? Not unless you like hot rubber. If it’s your only option, nuke the slice on a paper towel for 30–45 seconds, then crisp the bottom in a dry pan. That two-step saves texture and keeps the crust from turning into sadness.
“Can I make it better than the box says?”
That’s what we’ve been doing this whole time. Preheat longer. Rotate halfway. Check the bottom. Finish with chili oil or a little garlic butter crust brush. You don’t have to reinvent frozen pizza — you just have to treat it like it deserves to be eaten.
“How do I know when it’s actually done?”
Forget the timer. Forget the box. Use your eyes and a spatula:
- The crust should be golden and crisp underneath, not pale or gummy.
- The cheese should bubble and brown — not just melt.
- The center should hold up when you lift a slice. No flop, no slide.
That’s your finish line. The rest? Just noise
That’s it. No secrets. Just care, heat, and a little intention. Because frozen pizza isn’t about pretending it’s something else. It’s about getting the most out of what it is — and knowing that, on the right night, with the right bake, DiGiorno can hit like you actually planned this meal.
Final Thoughts: Frozen, But Far From Forgettable
Look — nobody’s pretending DiGiorno is fine dining. You didn’t pull this out of a wood-fired oven, or stretch the dough yourself, or source mozzarella from a dairy co-op in northern Vermont. You pulled it from the freezer. That’s not shame — that’s efficiency.
But frozen doesn’t have to mean soulless. It doesn’t have to mean soggy, uneven, or eaten out of the box like a raccoon over a trash fire. And the fact that you’re still reading this? Means you care. Means you’re the kind of person who wants that crust just a little more golden, that cheese a little more layered, that last slice to taste like it was baked for you — not just thawed for survival.
That’s why I wrote this. Not to sell you on frozen pizza. You already bought it. I just want you to cook it like you meant to. Like the box isn’t the end of the story — just the first draft. And once you get the hang of it, once you start trusting your eyes instead of the timer, adding that drizzle of hot honey, rotating halfway through because you know your oven — that’s when frozen pizza stops being “fine” and starts being a small, stupid victory you can actually look forward to.
So next time you slide one into the oven, do it with purpose. Set the heat. Prep your tray. Pour something cold. And when it comes out just right, when the crust sings and the cheese bubbles like it’s proud to be there — take that first bite standing at the counter. No plate. No apologies.
Just good pizza. Because you made it that way.
— Chef Marcus